At Phase 2, we care about our team and realize that we all have lives beyond the office. Instead of ignoring the fact that we are all individuals and have goals and interests outside of software development, we acknowledge it. Beyond that, we encourage it.
Encouraging each other to pursue our interests is fulfilling and ultimately adds to our creative culture as a company. In this Beyond the Office blog post, Colbey walks us through modifying FPV goggles for flying quadcopters through trees and around other obstacles without losing the visual signal mid-flight.
By day I develop software at Phase 2, but by night, I fly and modify quadcopters. When it comes to quadcopters, flying FPV (First Person View) is definitely more fun than flying LOS (Line Of Sight). Basically it involves a camera being on the quadcopter and a screen on either a headset or a monitor the pilot can watch.
These days, most racing quadcopters have a built in video transmitter and camera. This allows the pilots to pull off those ridiculous stunts when they are doing freestyle or split second moves through gates when it comes to racing.
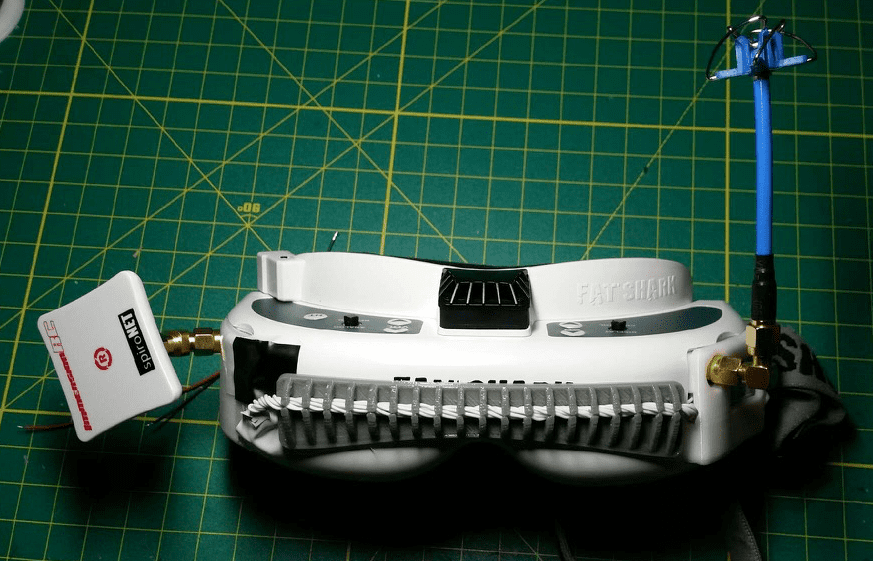
A lot of goggles come with a diversity setup already included in them. The EV800 goggle, however, does not. Having a diversity receiver means it has two different video receivers and two different antennas to catch the signal. A piece of hardware (in this case the guts of an arduino) then quickly switch between the two to get the best signal.
To add diversity to some goggles is easier than others. Take the very popular, but also very expensive, FatShark goggles for instance. It is simply a drop in module that plugs into the goggles, whereas other goggles like the EV800 we will be working on. The EV800 was not designed for diversity out of the box and needs to be modified.
This is a how-to guide that will take you step by step in adding diversity to Eachine ev800 FPV goggles. I could not find documentation of this process when I searched for it, so I hope this is helpful to others looking to modify goggles and enhance their FPV experience.
The Goggles
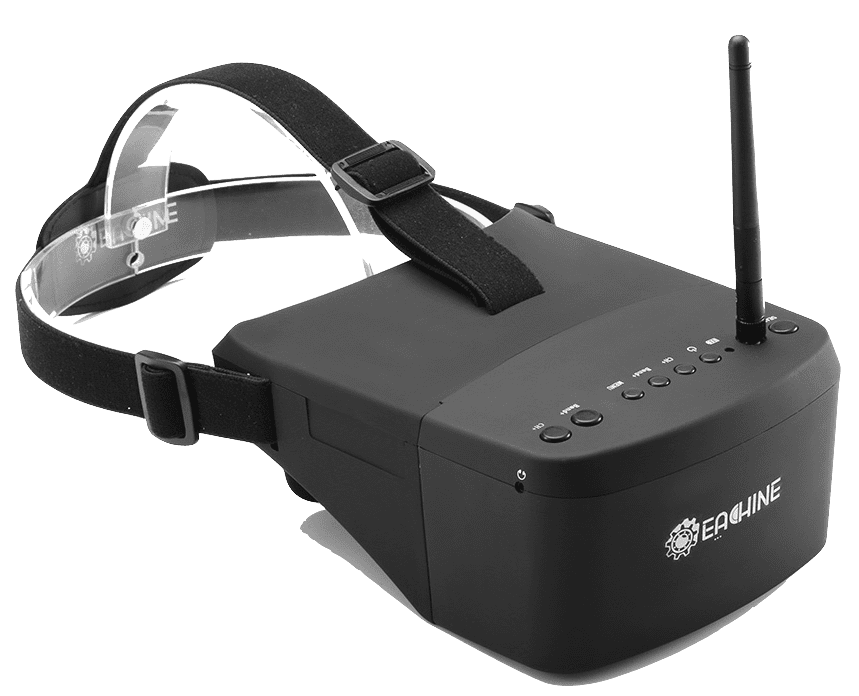
Eachines EV800 goggles are a great intro goggle for FPV flying. It offers enough features to give you an idea of what you might want next. It's price point is low enough that it is not a useless purchase if you intend to move on to more serious goggles later. They are great goggles to have to share the joy of your FPV flights with others or if you are interested in just having an extra screen to display your flights. Its downfall is that it has just one antenna (so no diversity) and it has no DVR, so you cannot record your flights. These are definitely not show stoppers, but they are something you will want eventually. This is what this guide will cover.
You can grab the EV800 goggles at a lot of places but I got mine from Banggood.
Enter Diversity!
The idea of diversity is simple. Say you are flying in an area with both open fields and sparsely populated trees. While you are flying in the open area, the antenna on your quadcopter and your goggles is not obstructed by anything between them so signal loss would come from being out of range or interference with other radio devices. Now, when you start flying in and out of the trees, we introduce trees between the quad and the goggles. This will suck the signal up and not allow as much of it reach the goggles. Having less signal means having a less clear picture.
With diversity, you have at least two video receivers on your goggles. Each receiver would have its own antenna. Ideally each antenna would be a different type of antenna. The diversity module would always be monitoring for the better signal, so different antennas would allow you to fly through the trees and have it automatically switch to whichever antenna has the better signal. That way we have less of a chance of losing signal during flight.
Most diversity setups will use an omni-directional antenna and a directional antenna. Those do exactly what it sounds like. The omni-directional captures signals from 360° around you and the directional antenna has a fixed range of degrees it works within.
In our example above, you could point your directional antenna towards the trees so when you start flying in that area the diversity module would select that antenna since it should have a better signal.
The GE-FPV Diversity module we will be using is also on Banggod, Amazon, and others. I got my GE-FPV RX5808 Pro Diversity Module on Banggood.
On to the Mod!
The goggles I had were a friends who had a faulty pair, and rather than have to return the faulty pair, the vendor sent another pair to him. Then he let me take the faulty pair apart to see what we could do to add in diversity. The initial problem was they did not always charge. It turned out to be a loose solder point. Luckily, it was an easy fix and we could continue this frankensteining with that pair.
The mod includes five steps:
- 1. Removing the existing RX5808 Video Receivers
- 2. Connecting the GE-FPV Diversity Module
- 3. Connecting the Eachine DVR module
- 4. Adjusting the housing of the goggles
- 5. Puting it all back together!
Step 1: Remove the existing receiver
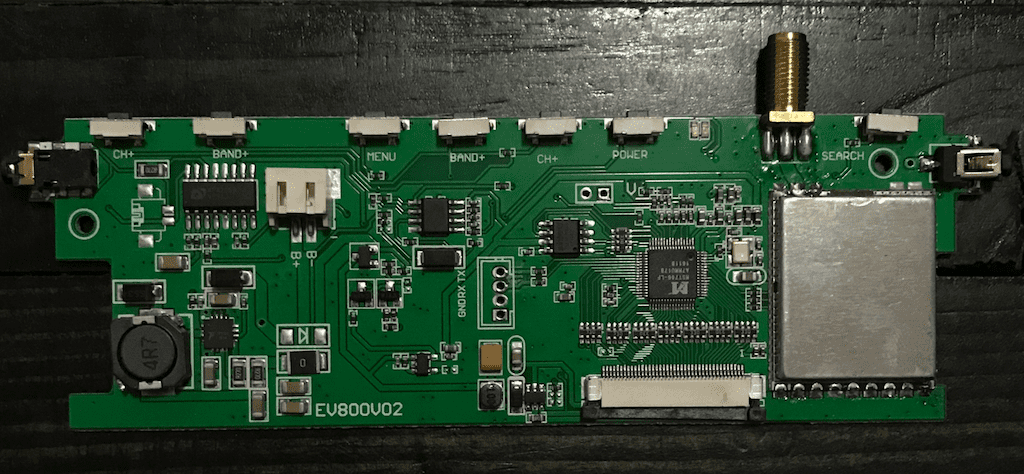
The first step of disassembly is getting the board out of the goggles. There are videos online of this, but basically you remove four screws on the bottom and slowly take the top part off. From there you can slide out the battery, control board, and LCD screen. The battery may initially be hot glued to the front so be weary of that. Once everything is out, disassemble that by unhooking the battery, and the LCD connector.
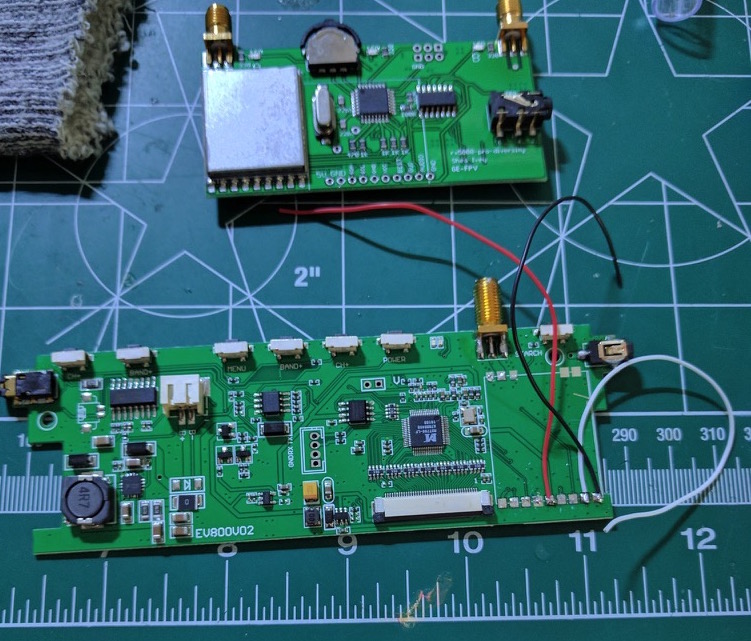
Now that we have the board on its own, its time for the hardest part of the mod. Removing the receiver. You need to unsolder each one of the solder points at the bottom, as well as the antenna solder spots at the top fo the RX5808 chip. To do this, I used my iron to heat up each pad for a few seconds so everything is warm, then I gently pried up on the right side of the RX5808 to see if I could get a spoodger underneath it. Once I had that, I moved the spoodger closer to the pads and worked on them individually. In doing this, be careful not to apply too much heat to either the control board or the RX5808 chip. Be careful not to flex them or apply too much pressure. In doing either, you run the risk of pulling up a pad or rendering the control board useless.
Pins!
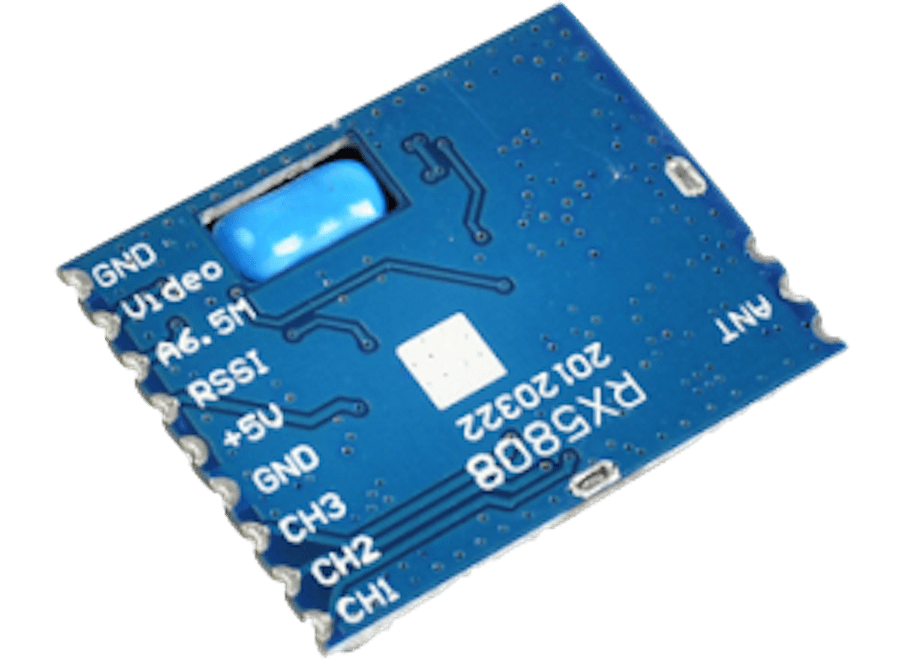
On the control board (with the receiver removed and the reciever area on your bottom left) the pins match the pinout of an RX5808 module as shown here. Keep in mind, the silk screen labels on the image would be facing the goggles control board so the pins from right to left on the control board would be would be GND, VIDEO, A6.5M (Audio), RSSI, +5V, GND, CH3, CH2, CH1. What we are looking for is the Video In, Ground, and Power pins. If you want to hook up audio, then take note of that pin as well. I did not use audio in my example.
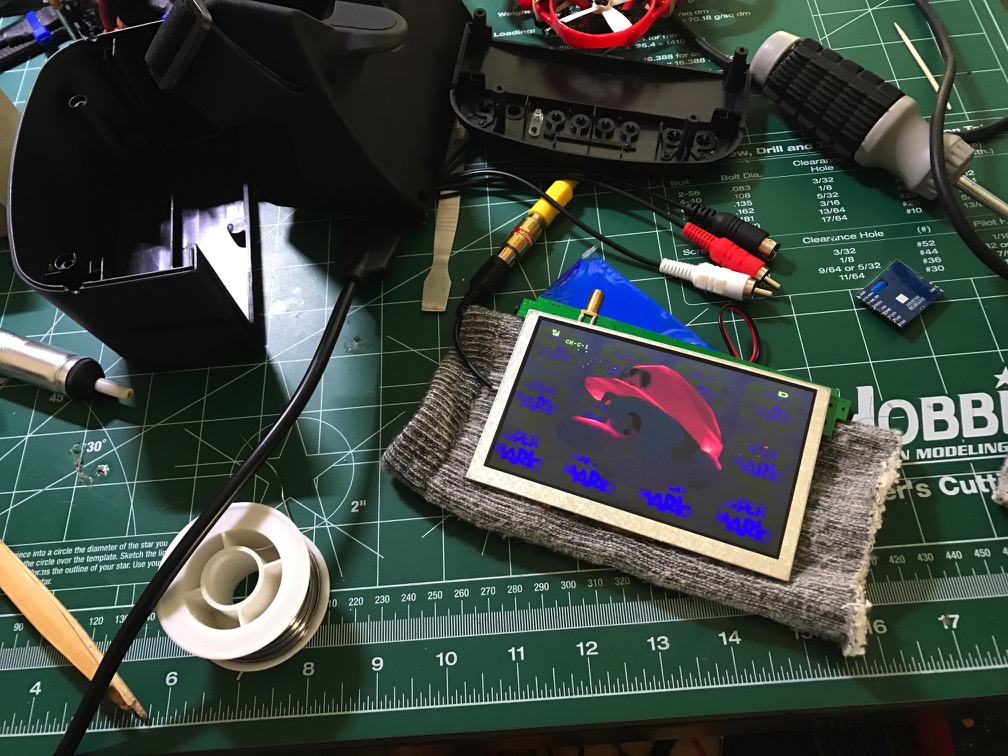
Once we have the old receiver off, we can check the video signal of the goggles to see if we can pass a signal into it. In this case, I decided to solder on an RCA jack and hook up my Nintendo 64 to it. Once soldered, I hooked everything back up and turned both devices on and I had MarioKart 64 on my screen!
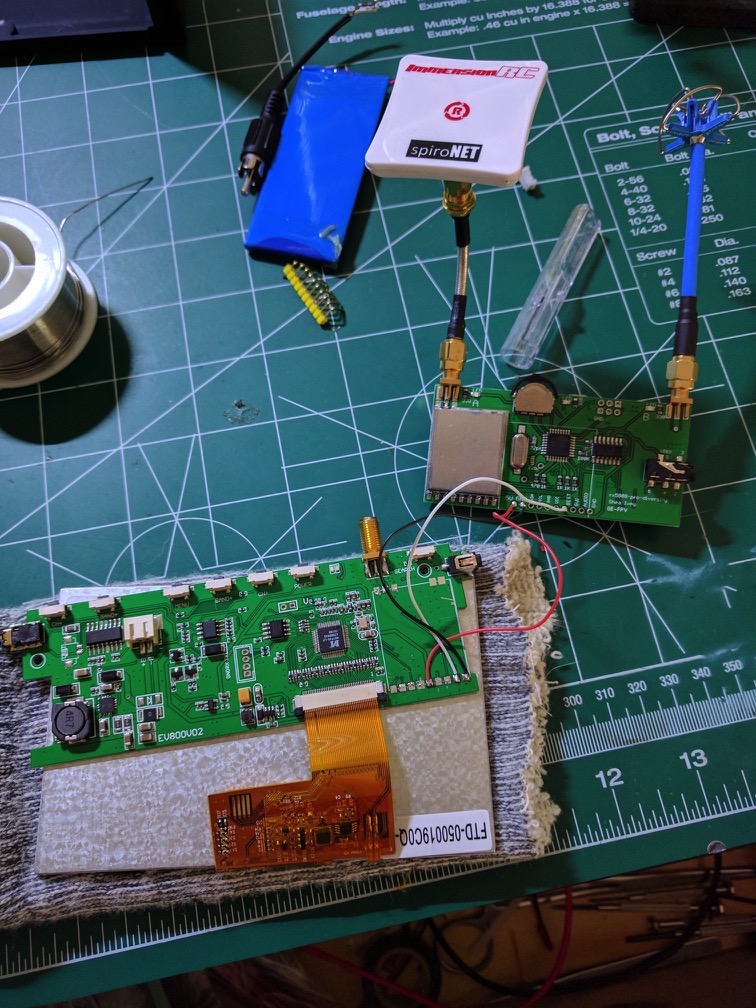
Now that we know we can feed it a video signal, it is time to hook up the GE-FPV diversity module! Wiring it up is pretty straigth forward. You use the Ground, Video, and Power (from right to left Pins 1, 2 and 5) pins on the control board. Hook them up to the labeled GND, 5V, and Best pins on the diversity board.
Programming the Diversity Module!
Depending on what version of software you have on the GE-FPV module, you may need to update it with a newer software image. Fortunatly, the software is open source and available on github at github/sheaivey/rx5808-pro-diversity. I needed to update mine so I could utilize Raceband as it was not currently enabled on the board I received. Updating is optional and has its caveats so if you do not need to update, skip on down to the "Connect the DVR" section.
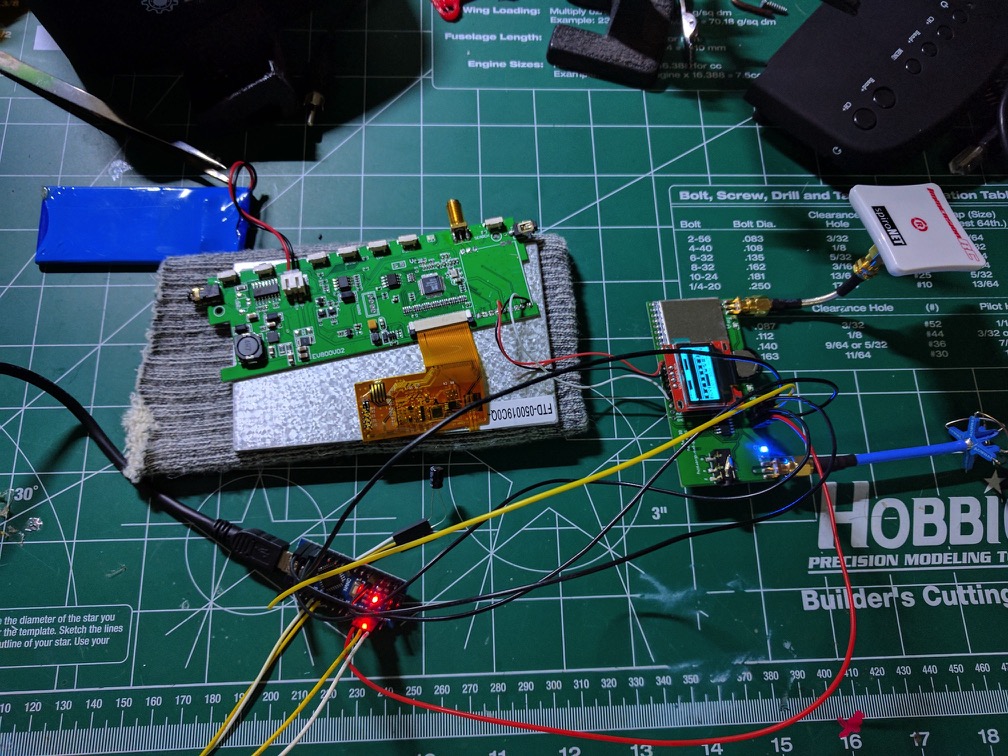
Programming it was a task on its own. I ended up using another arduino as an ISP programmer and hooked it up to the GE-FPV module. There are many guides online how to do this, but in its simplest form it comes down to:
- 1. Flash AruinoISP to your spare arduino
- 2. Connect the appropriate pins (detailed in the Arduino ISP sketch) to the ISP pin header of your GE-FPV module
- 3. Load up the sketch from Github for the GE-FPV module
- 4. Flash the compiled sketch
It sounds a lot easier than it was for me. I am on OSX and had to use Arduino app version 1.6.12 to compile and push the ArduinoISP sketch, and Arduino app version 1.6.0 to compile and push the GE-FPV sketch from github. This may be different by now, but there were some internal inconsistencies in things that would not allow me to compile the GE-FPV module on OSX with the latest Arduino version.
Connect the DVR
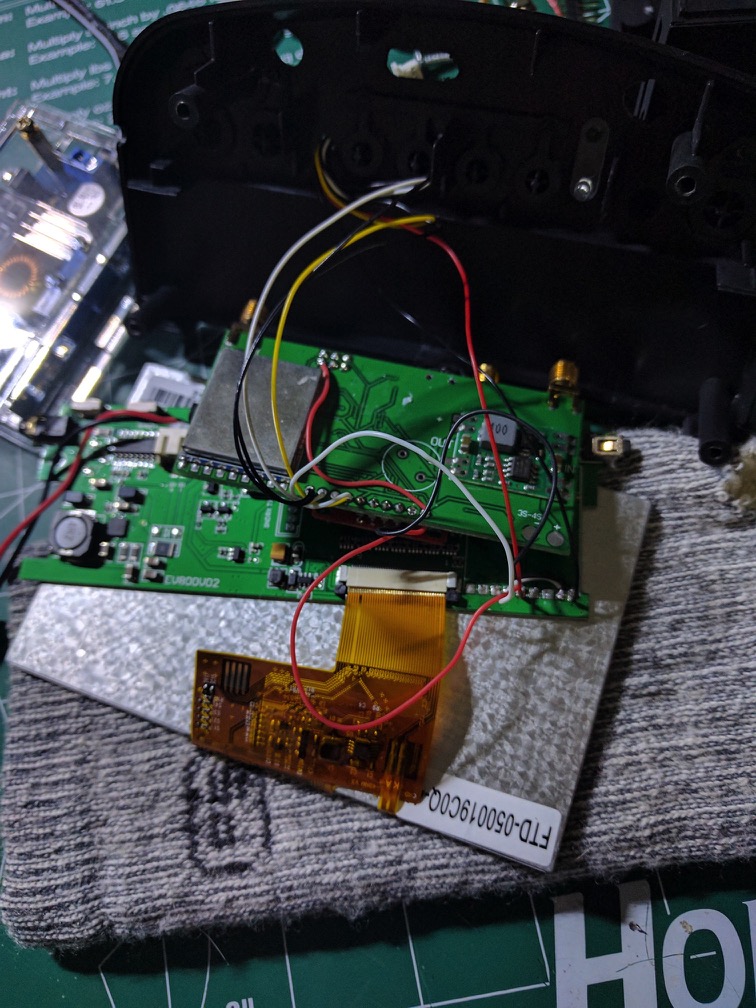
If you are not interested in having a DVR, you can skip this section. I liked having GoPro footage of flights, but sometimes DVR footage has its benefits.
The process for adding DVR is very similar to connecting the GE-FPV module. You need to hook up the Video, Power and Ground wires of the Eachine DVR module to the Best, 5V and GND pins on the GE-FPV module.
Lots of people say you need a voltage regulator to go from 5V to 3.3V but the specs on the Eachine module i have shows a voltage range of 3.3V - 5V and I have not had any issues yet.
You should check out the "Adjusting the Case" section below if you want to make the install neat and not have wires hanging everywhere. You should run the DVR cable through the hole you create in the case prior to soldering it, otherwise you will need to take the pins out of the JST connector and run them through the hole and then put them back in.
Diversity Testing
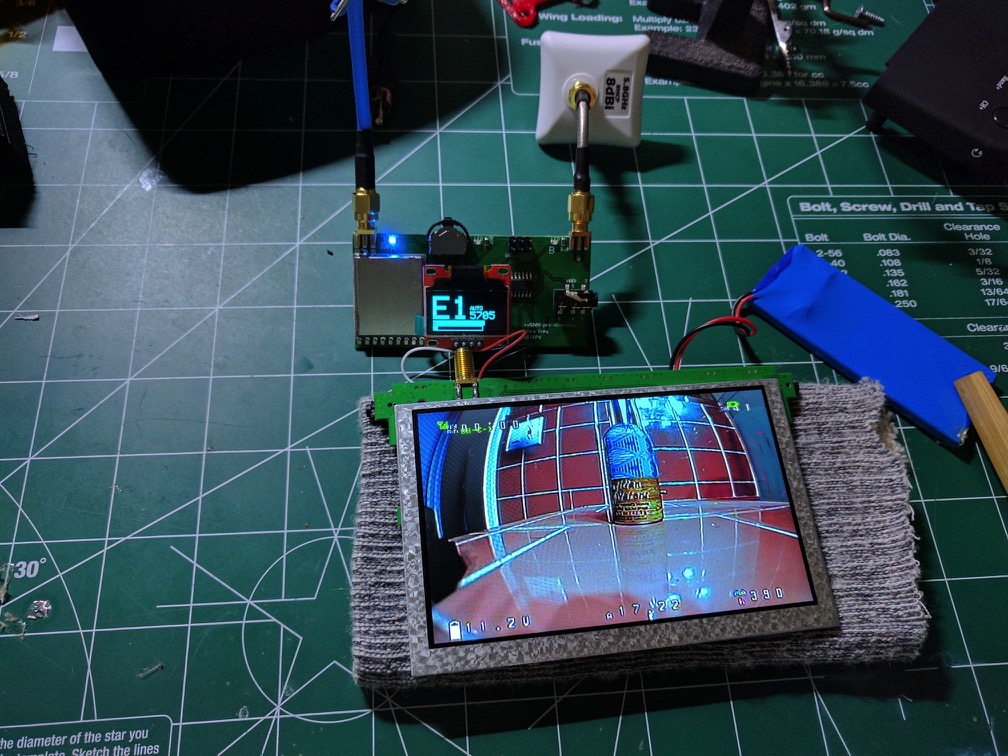
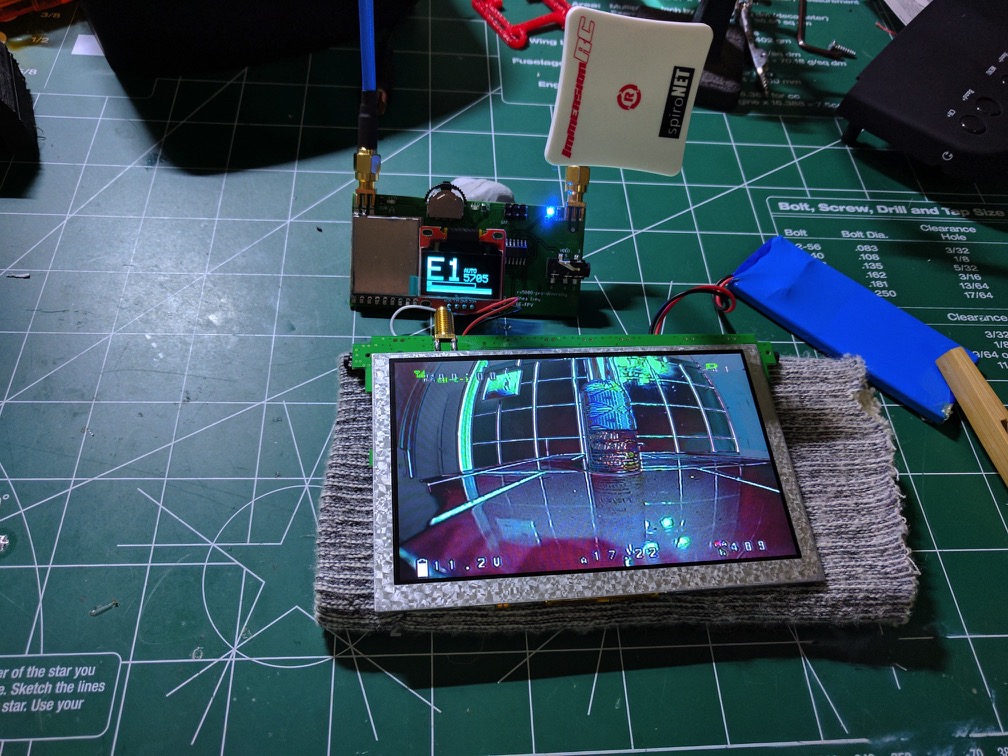
Now that we have everything wired up, we can hook it all up and test that it is working correctly.
I have installed an Omni antenna from Aomway, and a Patch antenna from ImmersionRC. To test, I took my quadcopter into the other room and put a battery on it. Then I faced the patch antenna away to make sure the omni-antenna is picking up. Then I pointed the patch antenna towards the room and it switched over!
Adjusting the Case!
Ok, we have walked the long road of hooking it all together and it is working! BUT, now we need to make it all manageable and mobile. In order to put it all together neatly, we will need to cut the original housing of the goggles.
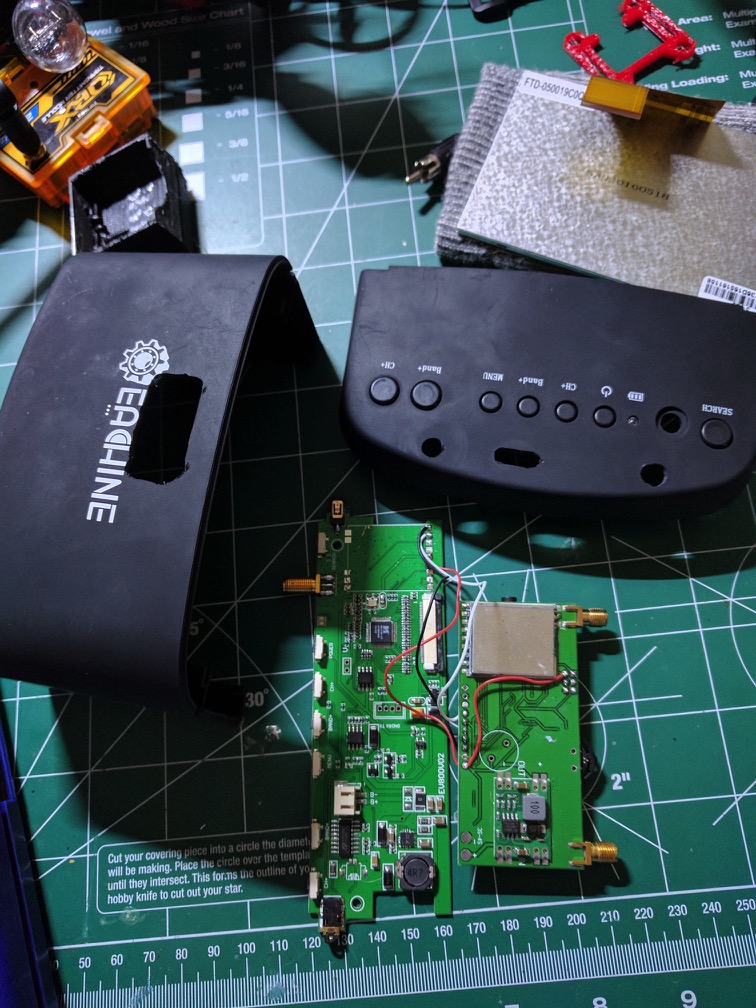
I chose to show the OLED screen of the GE-FPV module on the front of the goggles so I measured it out and used a dremel to cut a hole where it would be.
Next, we need to adjust the top plate so we have access to the toggle switch, and holes for the antennas.
Since we added DVR, we need a hole to run the DVR plug.
Putting it All together
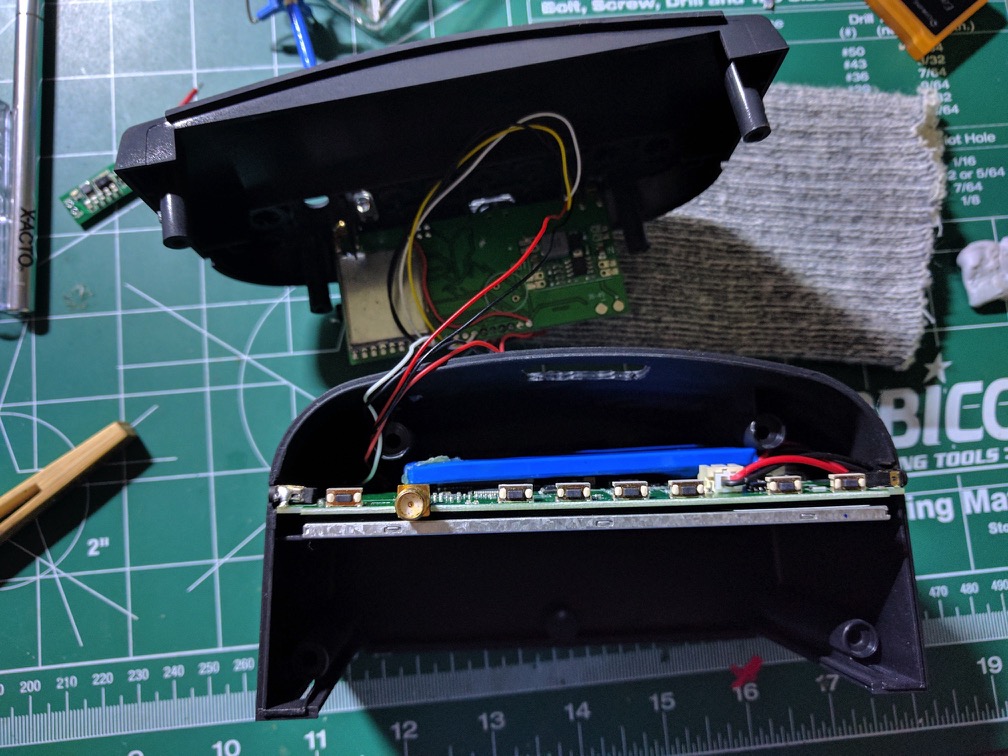
The easiest way to put it together is assembling the battery, control board, and LCD. Then slide that into bottom case so you have time to route the wires properly.
Now we need to mount the GE-FPV module onto the top plate. I slid it in and used the nut and washer on one antenna jack to help keep it in.
Now we will have an easier time manuevering the wires so they don't cover the OLED screen on the GE-FPV module and fit nicely without getting pinched between the case or anything else.
Its Done!
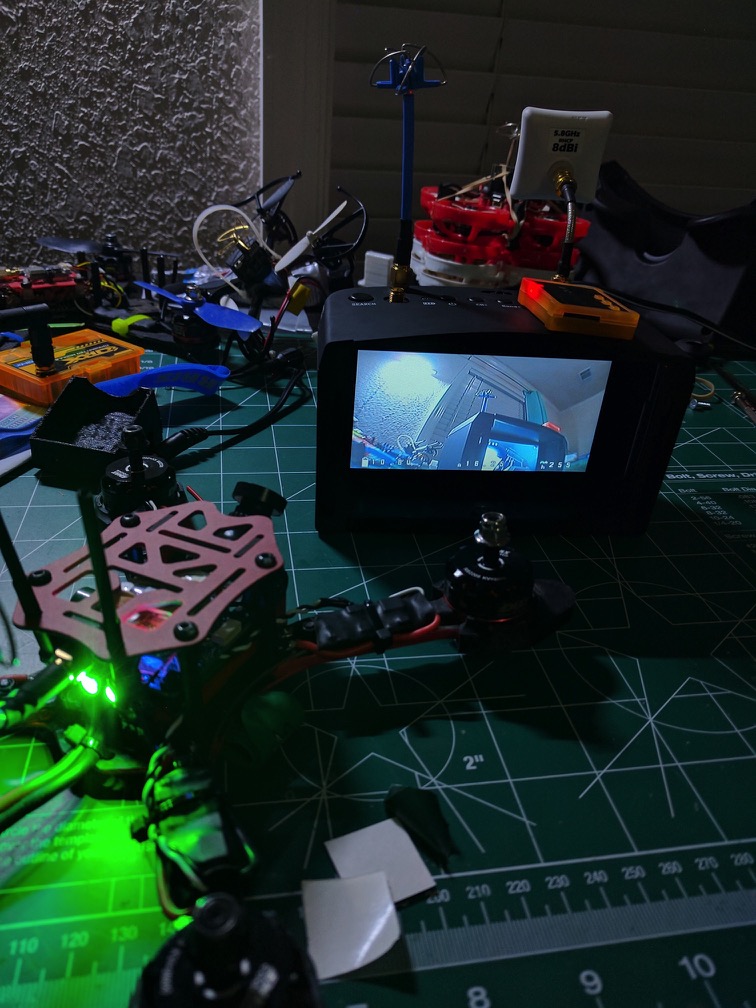
Now that its all together, we probably should test it again. At this point, everything should be good to go!
